
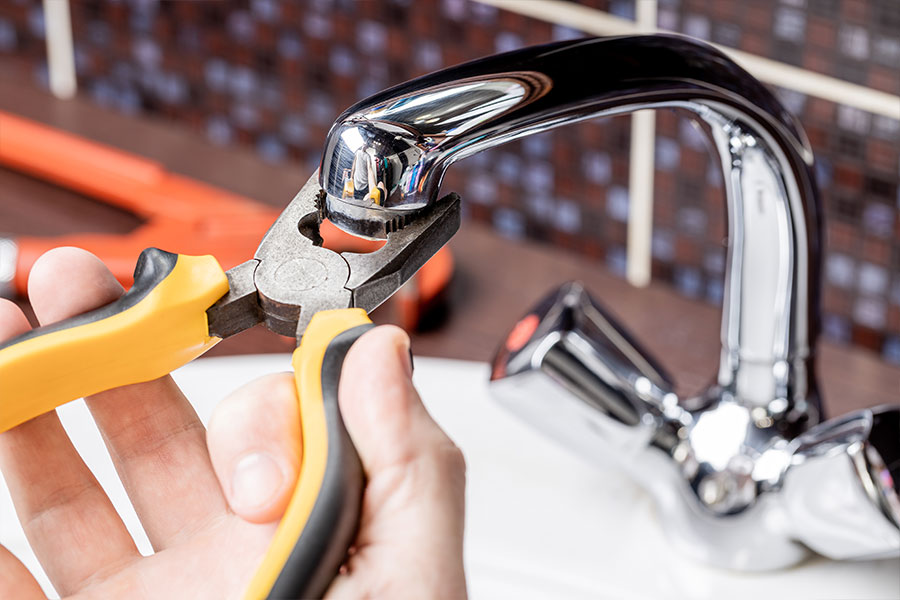
Picture the steady drip of a leaky faucet, each drop echoing your frustration as it interrupts the quiet of your home. If you’re in Haslet, TX, and tired of that incessant sound, you’ll want to know how to tackle this common issue. With a few simple steps, you can turn that annoyance into a quick fix. Let’s explore the essential tips that’ll help you get your faucet back in shape.
Identify the Type of Faucet
When tackling a leaky faucet, the first step is to identify the type of faucet you have.
You’ll typically encounter four main types: compression, cartridge, ball, and disc. Each has its own unique design and mechanism. Compression faucets have separate handles for hot and cold water, while cartridge faucets use a single handle to control temperature and flow.
Ball faucets feature a single handle that moves a ball within the body to regulate water, and disc faucets utilize a pair of ceramic discs to manage the flow.
To determine your faucet type, look closely at the handle setup and how it operates. Once you know what you’re dealing with, you’ll be better equipped to address the leak efficiently.
Understanding the specific faucet type is essential because it affects the repair process and the parts you’ll need. This knowledge sets you up for a successful and timely repair. Additionally, knowing the expert plumbing solutions available can help you decide whether to tackle the repair yourself or call in a professional.
Gather Necessary Tools and Materials
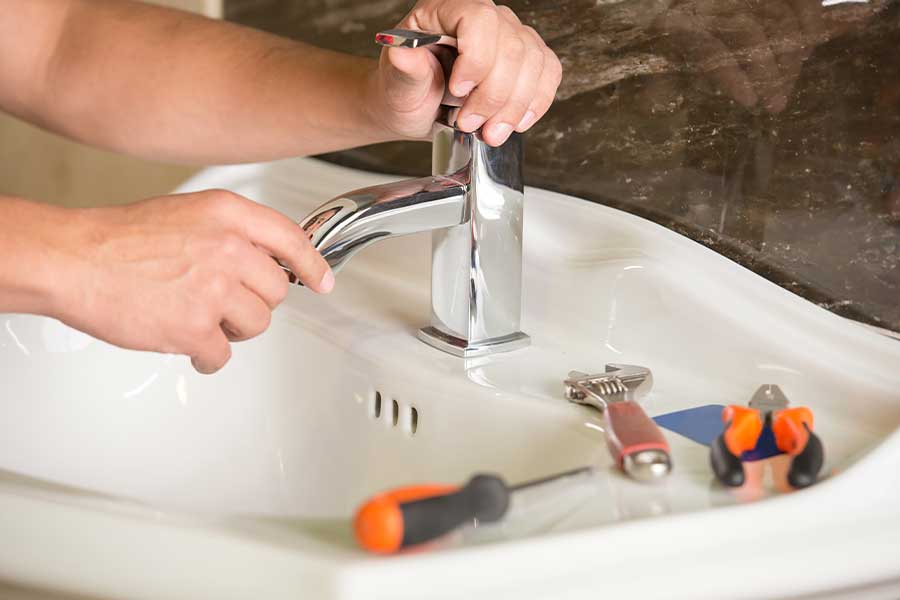
To successfully repair a leaky faucet, you’ll need a few essential tools and materials on hand. Start with a wrench, which helps you loosen and tighten the faucet components. A screwdriver is vital for removing screws and accessing parts inside the faucet.
You’ll also need replacement washers or cartridges, depending on your faucet type, to guarantee a proper seal. Keep plumber’s tape handy for securing threaded connections and preventing leaks.
Don’t forget a towel or rag to catch any drips as you work and protect your surfaces. A small container or bowl can help hold screws and small parts, keeping everything organized.
Finally, having a flashlight can be useful to illuminate tight spaces. With these tools and materials ready, you’ll be well-equipped to tackle that leaky faucet and restore your peace of mind quickly. Additionally, understanding the benefits of professional plumbing services can help ensure the best outcomes for your repairs.
Turn Off the Water Supply
Before you start fixing that leaky faucet, you need to turn off the water supply.
First, locate the shutoff valve under the sink or, if necessary, turn off the main supply to your home.
Once that’s done, test the water flow to verify it’s completely off, preventing any messy surprises while you work. Additionally, ensuring you have reliable plumbing solutions can save you time and hassle in the long run, making it worthwhile to consult a trusted partner for all plumbing needs.
Locate the Shutoff Valve
Locating the shutoff valve is essential for turning off the water supply before tackling a leaky faucet repair.
Usually, you’ll find it under your sink, attached to the pipes leading to the faucet. Look for a round or oval-shaped knob or lever.
If you can’t find it there, check the main water supply line, often located near your home’s foundation. Turning the valve clockwise will shut off the water.
Make sure to test the faucet to confirm the water flow has stopped before you start your repairs.
Knowing the location of the shutoff valve not only saves you from potential water damage but also gives you peace of mind during your repair process.
Turn Off Main Supply
Once you’ve found the shutoff valve under your sink or near your home’s main water supply line, it’s time to turn off the water.
This step is essential because it prevents any unwanted water flow while you’re working on your leaky faucet. To do this, simply twist the valve clockwise until it stops.
If you can’t locate a shutoff valve, you may need to turn off the main water supply for your entire home. Look for the main valve, typically found near your water meter.
Turning off the water supply guarantees a mess-free repair process and protects your home from potential water damage.
Remember to double-check that the water is off before proceeding with your faucet repairs.
Test Water Flow
After you’ve turned off the water supply, it’s important to test the water flow to verify everything is properly shut off.
Head to the faucet and turn it on. If water still drips or flows, you mightn’t have completely shut off the supply. This step is vital to avoid any potential mess or flooding during repairs.
If water continues to flow, check the shut-off valve again to confirm it’s fully closed.
Once you verify that the water is off, you can proceed with your repairs confidently.
Disassemble the Faucet Carefully
To disassemble the faucet carefully, you’ll want to gather a few essential tools: a screwdriver, an adjustable wrench, and a cloth to protect the finish.
First, turn off the water supply to avoid any spills. Next, place the cloth around the faucet to prevent scratches while you work.
Use the screwdriver to remove any decorative caps and unscrew the handle. Once the handle is off, check for any screws holding the faucet body in place.
Use the adjustable wrench to loosen and remove those components. Keep track of all the pieces as you disassemble; it’ll make reassembly easier later.
Be gentle with each part to avoid damaging the threads or seals. If you encounter resistance, double-check for hidden screws or clips. Additionally, consider seeking expert drain cleaning services to address any underlying plumbing issues that may affect the faucet’s performance.
Inspect O-Rings and Washers
As you inspect the O-rings and washers, pay close attention to any signs of wear or damage, since these small components are vital for maintaining a watertight seal.
Use a flashlight if needed to illuminate hard-to-see areas. Look for cracks, tears, or hardening, which can prevent a proper fit. If the O-rings feel brittle or are discolored, they likely need replacing.
Washers should also be checked for fraying or uneven edges, as this can lead to leaks.
Make sure you’re familiar with the specific type of O-rings and washers used in your faucet, as sizes and materials can vary.
If you notice any issues, make a note of them before moving on. Addressing these components early can save you time and hassle later.
This inspection is a significant step in ensuring your faucet functions smoothly and efficiently, preventing further leaks.
Replace Damaged Parts
When replacing damaged parts in your leaky faucet, you should start by identifying any worn components that need attention.
Next, choose high-quality replacements to secure longevity and performance.
Finally, use proper installation techniques to guarantee everything fits correctly and works efficiently.
Identify Worn Components
Identifying worn components in your plumbing system is essential for preventing leaks and ensuring smooth operation.
Start by examining the faucet handle and body for any signs of wear or damage, such as cracks or corrosion.
Next, check the washers and O-rings; these rubber parts can degrade over time, leading to leaks.
Pay attention to the cartridge or valve, as these can also deteriorate and affect performance.
If you notice any irregularities during your inspection, it’s vital to address them promptly.
A quick replacement of these worn parts can save you from bigger plumbing issues down the line.
Keeping your faucet components in good condition not only prevents leaks but also prolongs the life of your fixtures.
Select Quality Replacements
Choosing quality replacements for damaged parts is essential to ensuring your faucet operates effectively and lasts longer. When you’ve identified worn components, don’t skimp on replacements.
Look for durable materials like brass or ceramic, which resist wear and tear better than plastic. Check for compatibility with your faucet model; mismatched parts can lead to more leaks and headaches down the line.
Local hardware stores or trusted online retailers often carry reputable brands, so do your research before buying. Investing in high-quality parts now will save you time and money on future repairs.
Proper Installation Techniques
After selecting quality replacements for your faucet, the next step is to confirm they’re installed correctly for peak performance.
Start by turning off the water supply and draining any remaining water from the faucet. Carefully remove the damaged parts, confirming you note how they fit together.
Install the new components, following the manufacturer’s instructions closely. Use plumber’s tape on threads to confirm a tight seal and prevent leaks.
Tighten everything securely but avoid over-tightening, which can cause damage. Once reassembled, turn the water supply back on slowly, checking for leaks as you go.
If you see any drips, shut off the water and adjust the fittings. Proper installation confirms your new parts work efficiently and last longer.
Clean Faucet Components
A clean faucet not only enhances the appearance of your kitchen or bathroom but also guarantees peak performance. Before you reassemble your faucet, take a moment to clean its components.
Start by removing any mineral buildup or grime that can affect functionality. You can soak parts like the aerator and cartridge in a solution of vinegar and water for about 30 minutes. This helps dissolve stubborn deposits.
Use a soft brush or cloth to scrub away any remaining dirt, ensuring all parts are free from debris. Rinse thoroughly with water to remove any cleaning solution residue.
Pay special attention to rubber washers and O-rings; if they’re dirty or damaged, replace them to prevent future leaks. A thorough cleaning not only extends the life of your faucet but also contributes to smoother operation.
With clean components, you’re one step closer to a leak-free faucet!
Reassemble the Faucet
With the faucet components now clean and ready, it’s time to reassemble everything for ideal performance.
Start by placing the washer or O-ring back into the valve seat, guaranteeing it fits snugly. Next, carefully insert the cartridge or stem into the faucet body, aligning it with the grooves. Don’t forget to secure it with the retaining clip if your model requires one.
Once that’s done, reattach the handle by aligning it with the stem and tightening the screw. If your faucet has decorative caps, snap them back into place to finish the look.
Finally, double-check that all components are tightly secured but avoid over-tightening, as this may damage the parts. A careful reassembly guarantees long-lasting function and reduces the chances of leaks.
You’re one step closer to enjoying a fully functional faucet!
Turn On the Water Supply Gradually
Once you’ve reassembled the faucet, it’s time to turn on the water supply gradually to check for any leaks.
Start by locating the shut-off valves under the sink. Slowly open the valves one at a time, allowing water to flow into the faucet. This gradual process helps prevent sudden pressure surges that could cause leaks or damage to the plumbing.
As you increase the flow, keep an eye on the faucet and surrounding areas for any signs of water escaping. If you spot any leaks, you’ll want to address them right away.
Make certain to observe the faucet’s handle and base, as these are common areas for leaks to occur. By taking your time with this step, you can guarantee everything is functioning as it should before moving on.
Completing this check helps you catch potential issues early, saving you time and hassle down the line.
Test for Leaks and Make Adjustments
As you check for leaks, maintain a keen eye on all connections and joints of the faucet.
Turn on the water supply and observe carefully. Listen for any dripping sounds and watch for water pooling around the base. If you notice any leaks, don’t panic; it’s usually an easy fix.
Tighten any loose nuts or screws with a wrench, being cautious not to overtighten, which can cause damage.
If the leak persists, consider replacing worn washers or O-rings, as they often wear out over time.
Once you’ve made adjustments, test the faucet again to verify it’s functioning properly. Allow the water to run briefly and monitor for any signs of leakage.
If everything appears dry, congratulations! You’ve successfully repaired your leaky faucet.
If issues continue, don’t hesitate to contact a professional for assistance.
Conclusion
You’ve learned some essential tips for fixing that leaky faucet in Haslet, TX. By identifying your faucet type and following the steps we’ve outlined, you can tackle the repair with confidence. Isn’t it satisfying to fix a problem on your own? Remember, if the leak persists after your efforts, don’t hesitate to call in a local plumber for expert help. With a little patience and the right approach, you’ll have your faucet running smoothly in no time!