
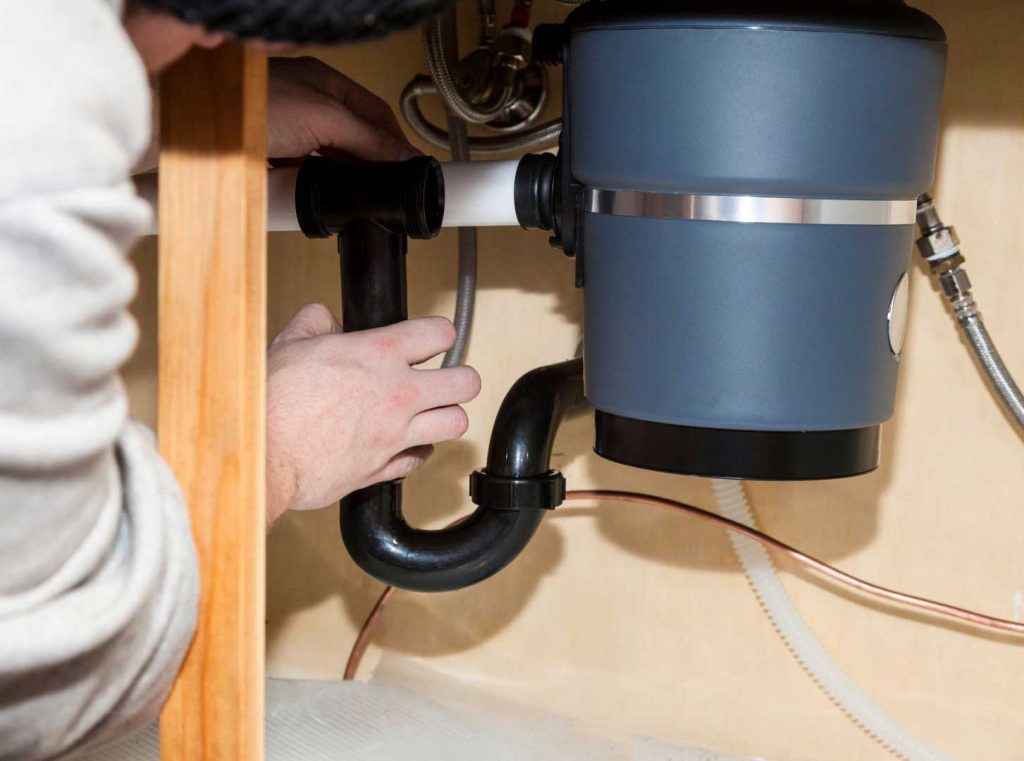
Installing a garbage disposal in Trophy Club, TX, doesn’t have to be an intimidating task. With just a few tools and a bit of patience, you can streamline your kitchen cleanup. First, you’ll want to gather everything you’ll need and verify that your water and power are off. Once you’ve got that sorted, you’ll be ready to tackle the next steps. Let’s explore how to make this installation a smooth process.
Gather Necessary Tools and Materials
Before diving into the installation of your garbage disposal, it’s essential to gather all the necessary tools and materials.
Start by collecting a screwdriver, pliers, and a wrench. You’ll also need a bucket to catch any water, a towel for spills, and safety goggles to protect your eyes.
Don’t forget the mounting hardware that comes with your disposal unit, as well as a power cord if it’s not already attached.
Having a manual or installation guide handy can be incredibly helpful, too.
Make sure you have some plumber’s putty or silicone sealant for a watertight fit.
Finally, grab a flashlight to illuminate your workspace, especially if you’re working under the sink.
With everything gathered, you’ll feel prepared and organized, making the installation process smoother and more efficient. This preparation sets the stage for a successful garbage disposal installation, as professional installation is recommended for safety and compliance.
Shut Off Power and Water Supply
Shutting off the power and water supply is essential before starting the installation of your garbage disposal.
First, locate your circuit breaker panel and find the switch that controls the kitchen outlets. Flip the switch to the “off” position to guarantee no electricity flows to the disposal during installation. If you’re unsure which breaker to turn off, you can also unplug the disposal from the outlet.
Next, turn off the water supply to the sink. Usually, there are shut-off valves located under the sink. Turn these valves clockwise until they’re fully closed. This prevents any accidental leaks or spills while you work.
Once both the power and water are shut off, double-check that the disposal is completely unplugged. Taking these precautions keeps you safe and minimizes mess during the installation process. Additionally, ensuring the disposal is properly installed can help prevent future drainage problems that may arise from improper use. Now you’re ready to proceed with the installation confidently.
Remove the Old Disposal (If Applicable)
If you’re replacing an old garbage disposal, start by disconnecting it from the sink and the plumbing.
First, unscrew the mounting assembly that secures the disposal unit to the sink. You’ll typically find a few screws or a clamp that you can loosen with a screwdriver.
Once the assembly is free, gently twist and pull the disposal away from the sink.
Next, detach the disposal from the drain line. Use a wrench to loosen the slip-nut connecting the disposal to the drain pipe.
Be prepared for any residual water to spill out, so have a towel or bucket handy.
After that, disconnect the power cord from the unit. If it’s hardwired, turn off the power at the circuit breaker and remove the wire connections.
With everything disconnected, you can safely remove the old disposal and prepare for the installation of your new unit. Remember that ensuring quality workmanship during installation can help prevent future plumbing problems.
Install the Mounting Assembly
With the old disposal removed, it’s time to install the mounting assembly for your new unit.
Begin by placing the mounting ring onto the sink flange, guaranteeing it’s seated properly. Tighten the screws by hand, but don’t overdo it just yet.
Next, attach the mounting assembly to the sink flange by rotating it until you hear a click; this locks it in place.
Once secured, you’ll need to slide the mounting collar onto the top of the disposal unit.
Align the disposal with the mounting assembly and twist it to lock it in place. Confirm it’s secure by giving it a gentle tug.
Finally, check the sealing gasket to ensure it’s in position, preventing leaks down the line. Remember, quality service from licensed professionals is essential for ensuring a successful installation.
You’re now one step closer to enjoying your new garbage disposal! Remember, each step is vital for a successful installation.
Connect the Disposal Unit
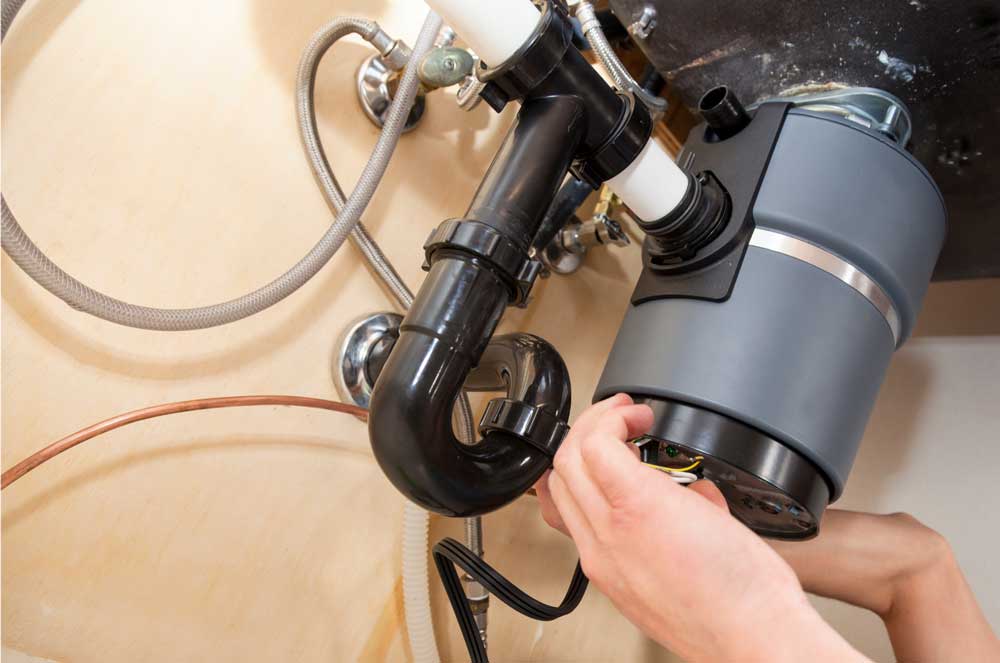
Now that you’ve installed the mounting assembly, it’s time to connect the disposal unit.
Start by aligning the unit with the mounting assembly and twist it into place until you hear a click.
Next, secure the dishwasher inlet if you have a dishwasher. Use a screwdriver to tighten the screws and guarantee it’s snug.
Here’s a quick checklist to follow:
- Connect the Power: Confirm the power cord is properly connected to the disposal.
- Secure the Drain Pipe: Attach the drain pipe to the disposal using the provided gasket.
- Check the Dishwasher Connection: If applicable, connect the dishwasher hose to the disposal inlet.
- Tighten Everything: Make certain all connections are tight to prevent leaks.
Once you’ve completed these steps, your disposal unit will be ready for its final checks!
Test the Installation
Now that you’ve connected your garbage disposal, it’s time to test the installation.
Start by checking the power connection and ensuring everything is secure.
Then, run a water test and listen for any unusual sounds to confirm it’s working properly.
Check Power Connection
After completing your garbage disposal installation, it’s essential to check the power connection to verify everything’s functioning correctly.
Start by ensuring the unit is properly plugged in and the electrical outlet is operational. Follow these steps:
- Inspect the Power Cord: Look for any frays or damage that could disrupt power.
- Check the Circuit Breaker: Make sure the circuit breaker hasn’t tripped; reset it if necessary.
- Test the Outlet: Use a voltage tester to confirm the outlet is providing power.
- Turn on the Disposal: Flip the switch to see if the disposal activates smoothly.
Run Water Test
Once you’ve checked the power connection, it’s time to run a water test to verify your garbage disposal is installed correctly.
Begin by turning on the cold water faucet. Let the water flow steadily for a few moments before switching on the garbage disposal.
Watch closely for any leaks around the sink, disposal unit, and drain connections. If you notice any water dripping or pooling, you’ll need to tighten the connections or adjust the installation.
After running the disposal for a minute, turn off the unit and check again for leaks.
Finally, turn off the water and confirm everything is functioning smoothly. This step verifies your installation is secure and ready for regular use.
Listen for Sounds
How can you be sure your garbage disposal is installed correctly? After running the water test, it’s essential to listen for sounds that indicate proper functioning.
Pay attention to any unusual noises, which can signal an issue. Here’s what to listen for:
- Normal humming: This indicates the motor is running smoothly.
- Grinding noises: If you hear this, it might mean there are foreign objects stuck inside.
- Unusual rattling: This could suggest loose parts or misalignment.
- Silence: If there’s no sound when you flip the switch, that’s a sign of a bigger problem.
Clean Up and Finalize the Installation
Once you’ve tested your garbage disposal, it’s time to clean up and finalize the installation.
Start by removing any excess materials or tools from the area to keep your workspace tidy.
Then, make certain to test the functionality thoroughly one last time to guarantee everything’s working perfectly.
Remove Excess Materials
After you’ve successfully installed the garbage disposal, it’s crucial to tidy up the workspace to guarantee safety and functionality.
Removing excess materials not only creates a clean environment but also helps you spot any leftover tools or parts that might pose a risk.
Follow these steps:
- Collect all packaging materials: Dispose of boxes and plastic wrap responsibly.
- Gather tools: Confirm you’ve got all your tools in one place to avoid losing them.
- Wipe down surfaces: Clean any spills or debris to maintain a safe workspace.
- Inspect your installation area: Check for any loose connections or parts before wrapping up.
Test Functionality Thoroughly
Before you finalize the installation of your garbage disposal, it’s essential to test its functionality thoroughly.
Start by plugging it in and turning on the power. Run some water and feed small food scraps into the disposal. Listen for any unusual noises or vibrations; a smooth operation indicates a proper installation.
If you notice any leaks, turn off the disposal and check all connections. Make sure the reset button is accessible and functioning.
Once everything runs smoothly, clean the area around the disposal, removing any debris or tools.
Finally, double-check that your kitchen sink drains efficiently. With these steps, you’ll guarantee your garbage disposal is ready for regular use, making your kitchen cleanup easier than ever!
Conclusion
Installing a garbage disposal not only makes kitchen cleanup easier, but it can also reduce the amount of waste sent to landfills. Did you know that nearly 30% of what we throw away could be composted or ground up in a disposal? By following these seven simple steps, you’re not just enhancing your kitchen; you’re also contributing to a more sustainable future. So, roll up your sleeves and enjoy the benefits of a cleaner, greener kitchen!